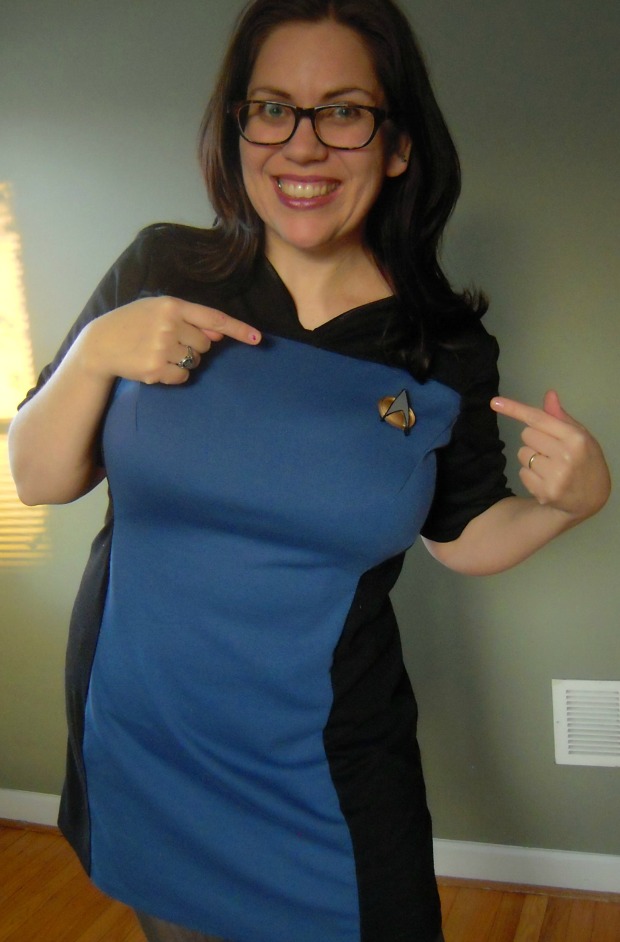
Thanks to everyone for your kind words about my TNG skant. I’ll be taking you through the process of cutting up a pattern to make into a TNG skant, like the one I made. You’re basically making a color blocked dress. As you see, my skant isn’t meant as a replica. The show costume has a front center zipper and then the colored front panel is attached over what I’m guessing is a zipped up dress. I’ve tweaked the design to omit the zipper and the double layer in front.
I won’t be showing you how to do the trim on the shoulders. I omitted it. I also don’t have the pips but that might be a purchase I make later. If you do the shoulder trim, leave me a note with a link so I can see how you did it.
Materials:
- Ruler (quilting or grab what you have) and pencil
- Large sheets of paper or paper taped together for tracing your pattern.
- Steam-a-seam (optional but will give you great, easy results)
- 1.5 yards of stable knit for each color. I used a Sophia Ponte Knit (a double knit) I got from The French Seam in town. Any Ponte Knit or other stable knit with some stretch should work. Jersey and ITY will be too drapey. I know Vogue Fabrics in the Chicago area carries it online and in their stores. About yardage: You basically need on “body length” of fabric of each color. You can measure yourself from your neck to where you want the hem to be (longer or shorter than mine) and that’s how much you need of each color. I’m saying 1.5 yards based on the Sophia knit. A narrower fabric (like 44″ wide) will require double the yardage. Had I chosen a narrower fabric, I would’ve needed 3 yards for this dress. I’m also having you get more than you need just in case and you can always use the left overs for another color-blocked outfit.
- Threads to match. I stitched my skant up in black. If you want a yellow skant, you might want to get yellow and black and switch back and forth while you sew. You’ll thank yourself later.
- Fold over elastic (optional but makes a nice neck finish). I bought 5 yards of this black FOE from Elastic by the Yard on Etsy.
- Shift or A-line dress pattern. You can use a pattern for knits or wovens. Mine was a pattern for wovens but I just took it in for a fitted knit dress. If this is your first time using your pattern, I’d recommend doing a test garment before cutting your fashion fabric. I was pretty confident about my pattern, so I went ahead and cut directly on my fabric. It’s your choice.
- Sewing stuff like sewing machine with zig zag, pins, marking pens, scissors, etc.
Before we start with developing our skant pattern, make sure you alter your dress pattern to fit your body. The most flattering cut is the one that fits you well. Check out the tutorial I wrote on how to do a FBA on a shift dress, which is what we’re using. You can always pivot your darts anywhere you like.
See this site that has instructions on spinning/pivoting your dart. I like the armscye dart for this dress but I stumbled upon it while I was working on my skant. If you have a larger bustline you might want to try this dart. In brief, your bust dart (or any dart) will tell the eye “look here!” so choose where you want the eye to scan. Side bust darts are not my friend. Most of my breast tissue is on the sides and if I’m in the concealing/slimming mood, I’ll go for a diagonal bust dart. This armscye dart draws the eye from the bust up toward my shoulders which are smaller in comparison.
Once your pattern fits you, you’re ready to start playing.
Step 1:
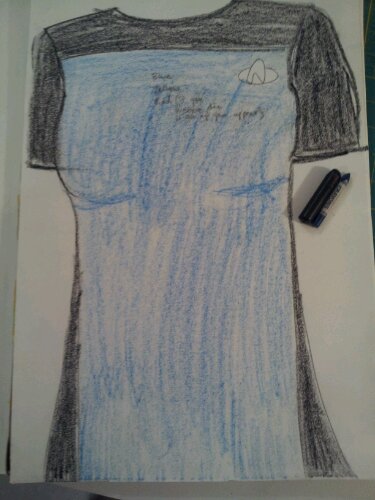
First we’re going to sketch out what we’re trying to do. I find it helps me understand the steps. We’re going for two colors in your color blocked dress. You can’t tell in my photo or my drawing, but you’ll see in the pattern that I cut the center blue block wider at the shoulders and then tapered it in just above my waist and then drew the line straight down.
Step 2:
Trace your pattern. If you want to go back and use the same well fitting pattern again, you won’t want it cut up into pieces.
Step 3:
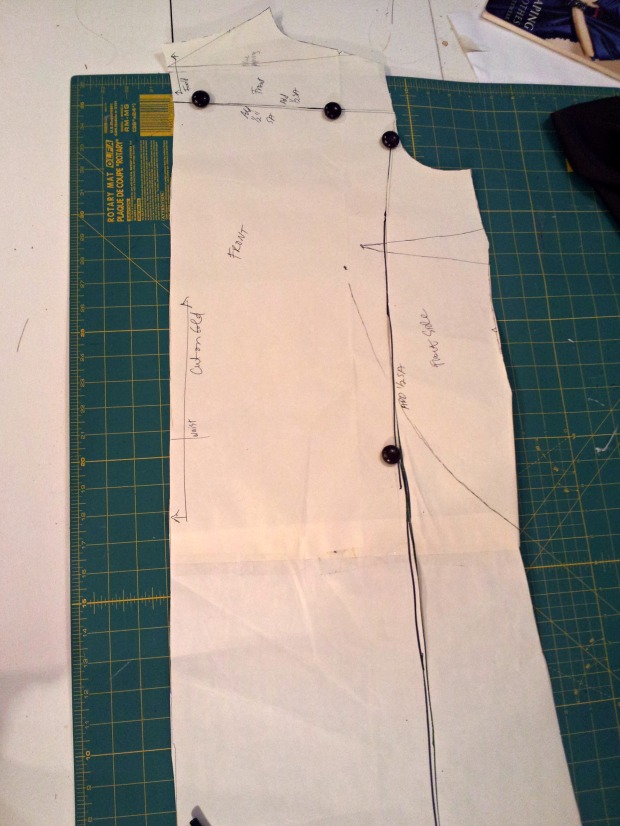
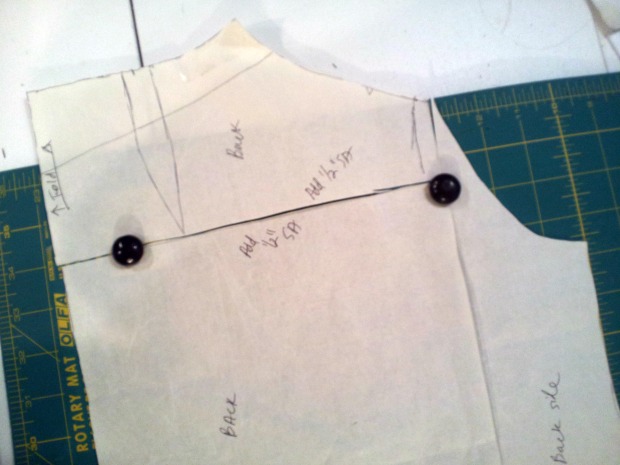
Draw your cutting lines. I started by cutting the top of the chest line, parallel to the floor, and about 2-3 inches from the center of the neck opening. The pattern I started with was a vintage 60s dress which is why there’s the raised neckline. I trimmed that down and created more of a v-neck.
My brown pattern weights are really Junior Mints, one of my favorite chocolates. Only problem is eating my sewing tool.
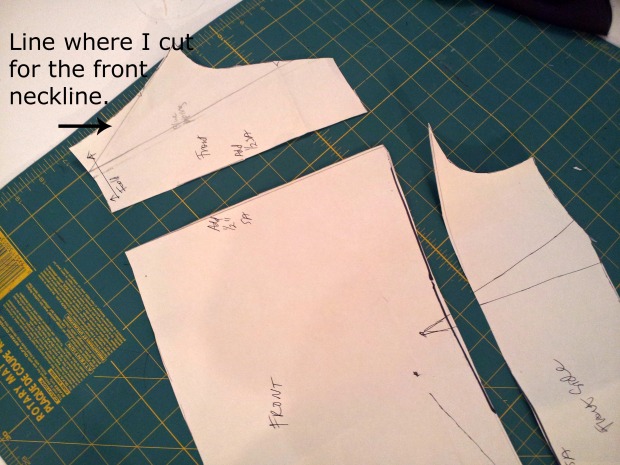
You’ll also see from this picture that I have two darts. One side bust dart and a french dart that comes from the hip up to the bust. If you go back to my finished skant pictures, you’ll see I forgot to take that french dart as there’s extra fabric right where the dart should have been pinched out. Don’t make my mistake. Just add darts. Darts can be your friend.
The second line I drew is the vertical line from the armhole/armscye down to the hem. I wanted the blue to visually look like the width in the show so what you can do is measure across your middle to see how wide you want the color to be. My blue front panel is about 10 inches wide. Go off of what will be flattering to your body. You can drape the color panel across your front so get an idea of what you like.
You’ll also need to decide how long your want your skant. I don’t think you need to have it be super short. Mine isn’t and I think it still reads as a skant. I’ve also seen other fans wearing longer skants and they still read as TNG. It’s ultimately your choice. If you feel comfortable with a mini skirt skant, go for it.
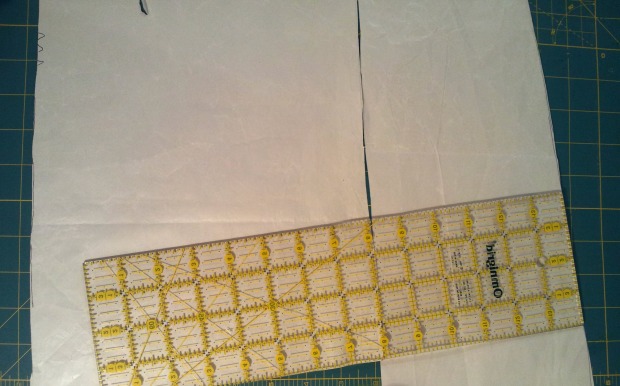
Only thing I’m going to tell you to do is make sure you have squared off your skirt side seams. Just put a straight edge against the side of your front and back pattern (once you’ve cut it to the length you want it plus seam allowance) and start your cutting line on the straight edge. After that you can curve it to match the front of the dress.
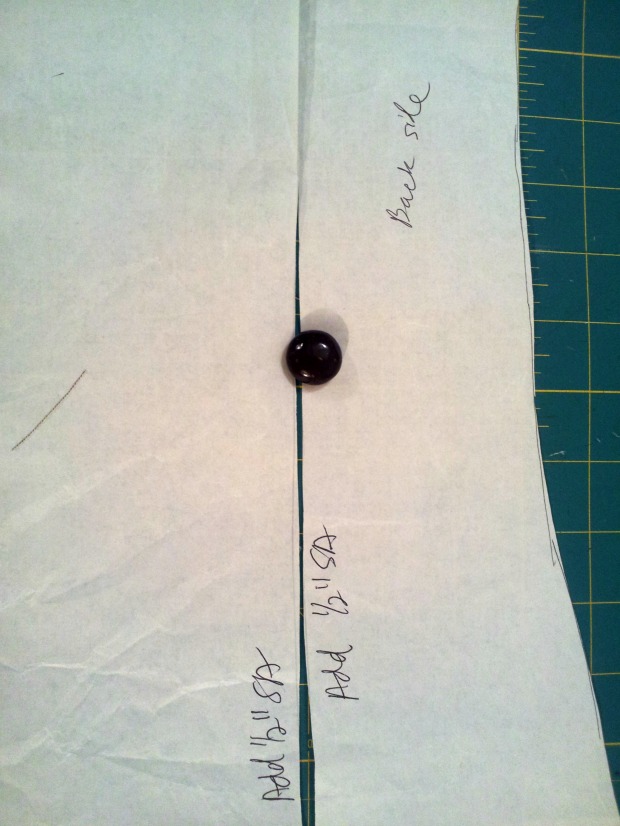
Make sure you label your pattern as you go. Write in that you need the centers to be cut on the fold and that you need to add seam allowances wherever you cut. Each piece should also say whether they’re the front or the back. They might start looking alike.
Back side panel well marked. I like adding 1/2″ seam allowances but if you’re not sure about fit you can always add more of an allowance. I wouldn’t recommend narrower than 1/2″ SA unless you’re super sure about the way your knit stretches and the fit of your pattern.
Step 4:
Cut your pattern apart. Here you can see the pieces cut apart and ready for seam allowances. Remember that the sides that don’t have notes about adding seam allowances already have them included in the pattern. I’ve also pointed out how I changed the neckline.
Step 5:
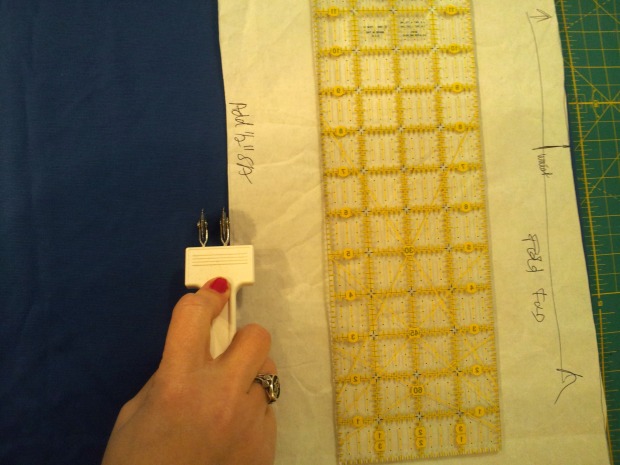
Now it’s time to trace your fabric. I’m using a double tracing wheel on the cut sides because it gives me my stitching line and my cutting line. See, I’m a sloppy cutter so I rely on my stitching lines a lot. I’ve got my double wheel set to a 1/2″ seam allowance and I just put tracing paper in between my fabric layers. 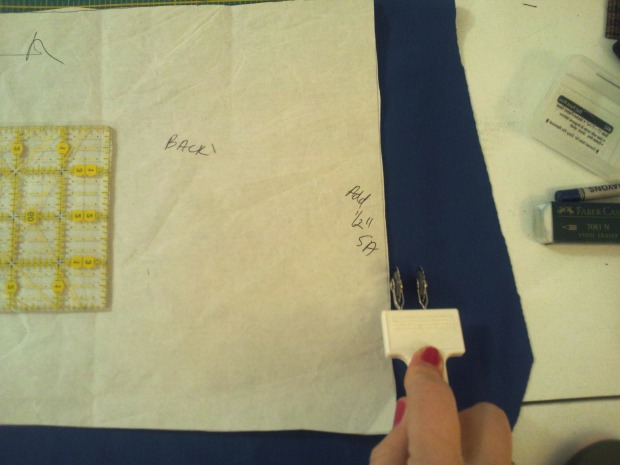
I usually put something on top of my pattern so it doesn’t shift, too. But, as you can see, not much.
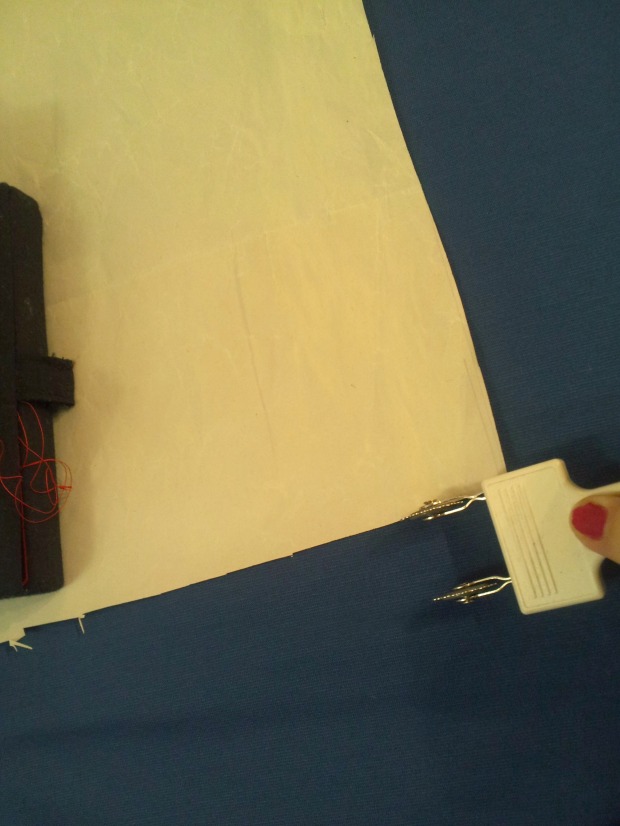
When I got to the hem, I added an 1″ seam allowance and set my double wheel to that measurement. You can always measure and chalk or use an erasable fabric marker to mark your cutting edges.
Step 6:
Dress assembly. I’m assuming you can sew some so these directions will be brief. If you have any questions, let me know. Check out tutorials on sewing with knits from Sewaholic’s roundup. There is a lot of knit help on the webs.
- Apply steam-a-seam to the upper chest pieces and sew the front one to the front right sides together and the back piece right sides together to the back piece, right sides together.
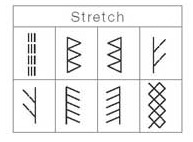
I like using the stitch you see pictured below. I used the two top middle stitches depending on which way I had the fabric going into the machine. I’ve heard great things about the lightening bolt stitch but my machine doesn’t have it.
- Press stitches as you just sewn them, then press away from the body. Use a press cloth if you’re using the Sophia knit. My iron shined the knit during a test iron.
- Trim seam allowances to 1/4″ and topstitch (again with a stretch stitch- otherwise your seams will pop open) with the black thread against the black (upper chest) pieces.
- Apply steam-a-seam to the vertical raw edge of the side fronts and with right sides together, sew the sides panels to the front with a triple stitch or other stretch stitch. Topstitch with stretch stitch.
- Apply steam-a-seam to the shoulders and, again, right sides together, sew them together. You can topstitch the shoulder with a stretch stitch, too, if you like.
This is what you should have now:

You can, at this point, either stitch up the side seams and then sew the sleeves on, finishing with hemming your sleeves to your preferred length OR hem the sleeves first and then stitch the sleeves on flat. Sew up the front and back together, right sides together, from the hem all the way up to the armpit and turn your dress so you can keep sewing all the way to the end of the sleeve, just like with the Tiramisu knit dress pattern. I attached the sleeves after sewing up the front and back side seams.
Apply steam-a-seam to your hem and hem it to your desired length. Stitch with stretch stitch.
Finish the neckline by applying fold over elastic (FOE) as described in this Cal Patch tutorial.
The only thing you need to complete your TNG skant would be a combadge. I got mine from Roddenberry.com. It has velcro you can sew on.
Let me know if I’ve left anything out but again, I’m assuming you can sew a basic dress. Have fun and Make it So!
If you make a skant from this tutorial, I’d really love to see it. Also, if anyone makes skants for sale from this tutorial, let me know so I can link their shop in my blog post. Thanks!
Good tutorial. =) You’re skant is so great!
LOVE your pattern weights – lol! I often have Junior Mints in my sewing room too but I’ve never really thought of them as a tool, hehe. (I eat them too fast for them to be useful!)
I almost always use just a plain basic zigzag stitch when sewing stretch fabrics. Occasionally, I use the triple stitch or a double needle. I will have to try the zig with a straight edge – thanks!
Arg – “your” where did that ” ‘re” come from?? I got up too early. =)
Thanks Brooke. I hope it helps someone. I usually shy away from long tutorials. I hope it doesn’t overwhelm someone trying to get their Trek on. 🙂
I love Junior Mints and tend to eat them a little too quick. 🙂
Let me know what you think of that stretch stitch. I’ve just had bad luck with my basic model’s triple stitch but I once had a machine that did the triple beautifully.
Thanks for sharing this tutorial!
Cool! The pictures made it really clear! 🙂
Oh, good. I was nervous it wouldn’t be enough. Thanks.
Wonderful!!!! I’m going to bookmark this for when I finish the projects I’m working on. Nerds Unite!!
Awesome. If you have any questions, let me know. You know where to find me. 🙂
This is all Greek to me but I’ve never successfully sewed anything in my life. Lol Still, I think it would be amazing to be able to create something, especially since I find myself with a lot of extra free time. My mom is a fairly able seamstress so I’m hoping between us, we can fashion a skant worthy of the Enterprise. Yours turned out absolutely gorgeous btw! You look adorable and even while it’s not up to specs as far as the pips and zipper go, it is still phenomenally recognizable and I can only hope mine comes out half as well. 🙂
Actually, just for future reference, in case if this venture should a) never come to fruition or b) go horribly wrong, would you be willing to make this dress on commission? And, if so, what would be your ball park price?
I am over the moon that I found (another) sewing geek/nerd that is why I linked you at blog: http://nur-noch.blogspot.de/2014/08/wenn-geeks-basteln-best-of-geek-diy.html. Thanks for sharing!
I think your dress is awesome, I went to a convention yesterday, and am determined to go in costume to my next one.
You totally should dress up! It’s so much fun going to a con in costume. Have fun!